Introduction to the Seldinger Technique
The Seldinger Technique is a foundational medical procedure employed by interventional radiologists, cardiologists, and virtually any medical professional looking to access a vein or artery. This method ensures safe access to blood vessels via a percutaneous puncture.
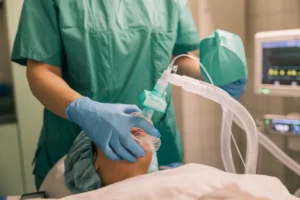
One of the crucial steps in central line placement is accessing the vein. For those new to the procedure, this can be a daunting task. The Seldinger Technique is a preferred method for many experienced practitioners to ensure safe and precise access to the vein for central line placement.
Historical Overview of the Seldinger Technique: Sven Ivar Seldinger
In 1953, the innovative Swedish interventional radiologist Sven Ivar Seldinger revolutionized the field of vascular access. His groundbreaking technique, introduced at the Karolinska Hospital, marked a pivotal moment in medical history. Before this, the venous cutdown technique was the standard approach, but Seldinger’s method offered a safer and more efficient alternative.
The Seldinger technique utilizes a steel needle to introduce a guidewire into a vessel. Depending on the procedure, the accessed vessel can be either an artery or a vein.
A snapshot of Seldinger’s contribution:
- Revolutionized interventional radiology
- Reduced complications associated with the venous cutdown technique
- Became the gold standard in healthcare
Applications of the Seldinger Technique
The versatility of the Seldinger technique is evident in its wide range of applications across various medical disciplines:
- Venous access for central venous catheters
- Venous or arterial access for cardiology procedures
- Venous or arterial access for interventional radiology procedures
- Insertion of chest tubes and drains
- Insertion of PEG tubes
A Step-by-Step Guide to the Seldinger Technique
Step 1: Needle Puncture
Begin by using a steel hollow bore needle to puncture the targeted vessel or cavity:
- Position the needle bevel facing up on your syringe.
- Identify the insertion point, typically near the femoral artery, brachial artery, or internal jugular vein, depending on your procedure.
- Insert the needle into the skin at a 45-degree angle, although this may vary based on the patient’s anatomy.
- Apply gentle suction using the syringe as you advance the needle.
- The syringe should fill with blood once the needle is correctly positioned inside the vessel.
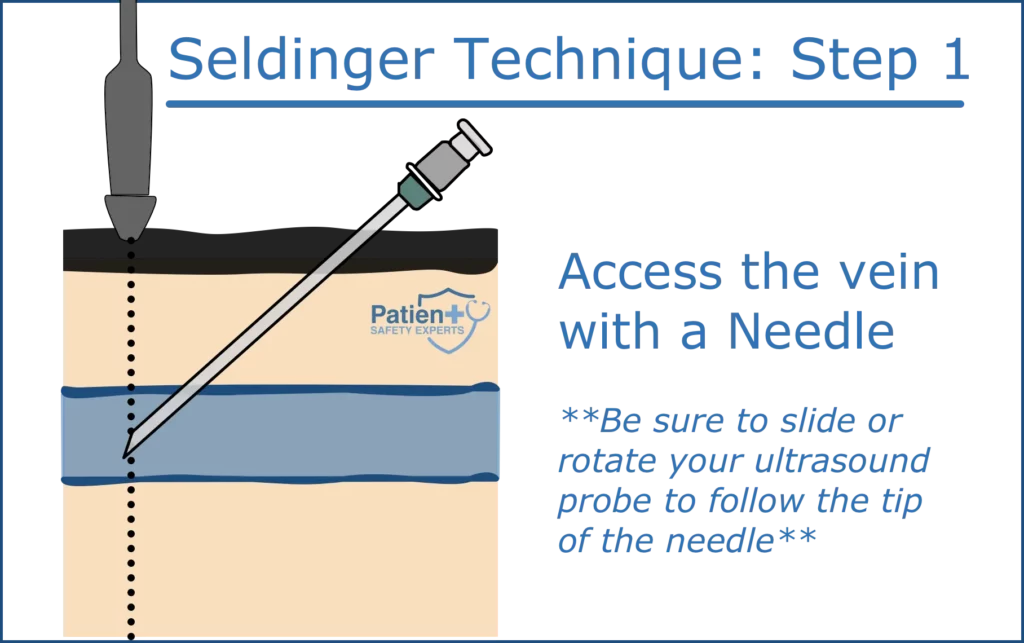
KEY POINT: If you adjust your needle angle as you advance, you will tent the tissues and create a Z-track underneath the skin through which the wire will pass. This Z-track makes it difficult to dilate and advance the catheter over the wire.
To learn more about how to confirm that your needle is in a vein, see our post: Central Line Placement: Ultrasound vs. Manometry
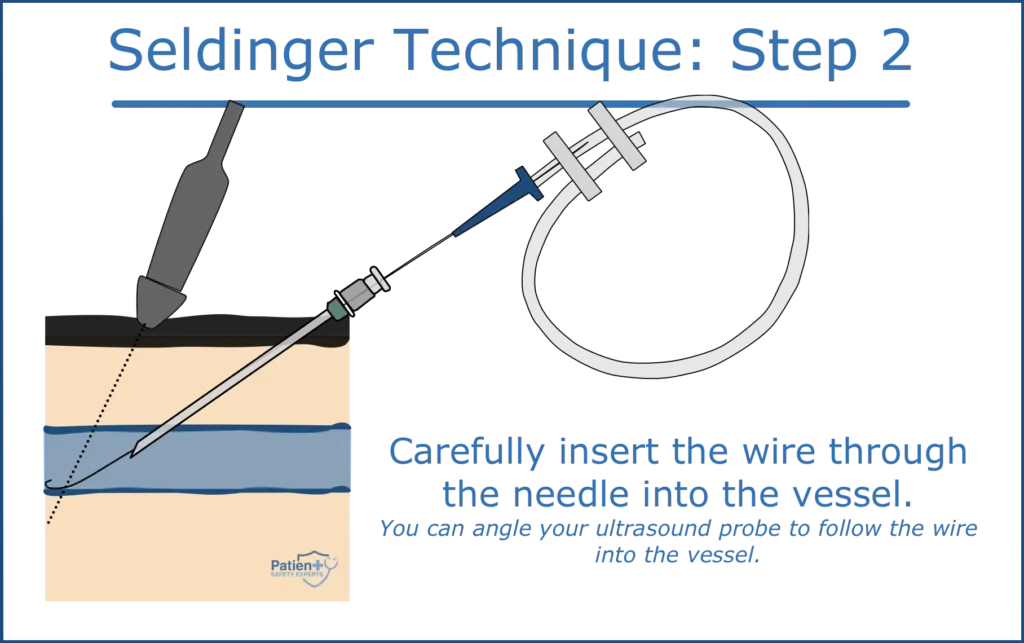
Step 2: Guidewire Insertion
After successfully accessing the vessel:
- Stabilize the steel needle and carefully introduce the guidewire.
- Ensure the guidewire advances smoothly without any resistance.
- Typically, the wire should not be advanced beyond the 20cm mark.
- Use a needle to create a puncture, guided by a guide wire.
- Remove the inner needle, leaving the guide wire in place.
- Insert the catheter over the guide wire and advance to the desired location.
- Confirm the position of the catheter tip using longitudinal view ultrasound guidance.
- Secure the catheter and remove the guide wire.
Step 3: Needle Withdrawal
Upon the successful placement of the guidewire:
- Securely hold the guidewire.
- Gently withdraw the steel needle over the wire and dispose of it safely.

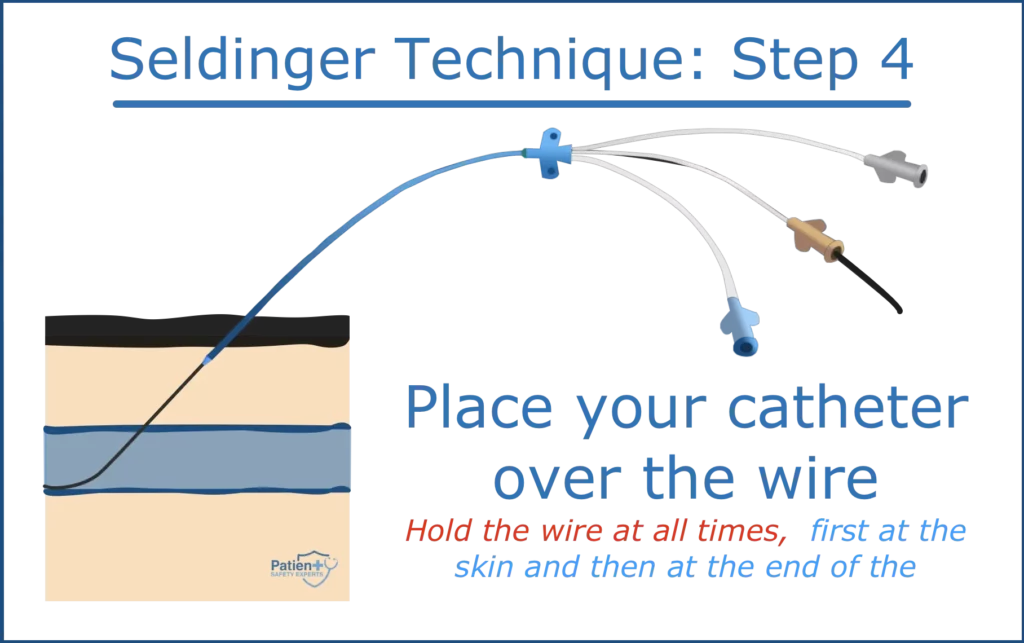
Step 4: Introducing the Catheter
With the guidewire in place:
- Pass the sheath/cannula/dilator/catheter over the guidewire.
- Ensure it enters the lumen of the vessel or cavity without complications.
Clinical Trials and Primary Success Rate
Clinical trials have consistently underscored the high primary success rate of the Modified Seldinger Technique, especially when compared to traditional methods. Key findings include:
- Higher odds ratio of successful catheter insertion
- Decreased infectious complications
- Enhanced safety in emergency department settings
Importance of Ultrasound Guidance
Ultrasound guidance, particularly in the operating theatre, has emerged as a pivotal tool for ensuring the accuracy of catheter insertion. Benefits include:
- Accurate visualization of the central venous system
- Real-time confirmation of catheter tip placement
- Minimized risk of puncturing adjacent organs or vessels
Complications and Prevention
Though the Seldinger Technique is deemed safe, complications can arise. Interventional radiologists need to be vigilant and practice safe access. Key complications and prevention methods include:
- Infectious complications: Ensure antibiotic prophylaxis before the procedure.
- Misplacement of the catheter tip: Use ultrasound guidance for precise placement.
- Multiple punctures: Aim for a single puncture at a different site, avoiding separate skin punctures.
Key Points and Pro Tips
- KEY POINT #1: After the initial needle insertion, it is essential to confirm the needle’s position. At this stage, only the needle’s presence inside a vessel is confirmed, not whether it’s an artery or vein.
- PRO TIP: A “bounce” technique can be used to help the needle “pop” into the vessel.
- KEY POINT #2: Adjusting the needle’s angle during advancement can lead to a Z-track formation, complicating further procedures.
- PRO TIP: Always maintain a firm grip on the guidewire to prevent any complications, such as the wire being inadvertently pulled into the patient.
Conclusion
In conclusion, the Seldinger Technique, thanks to pioneers like Sven Ivar Seldinger, has transformed the landscape of interventional cardiology and radiology. By understanding its history, procedure, and the pivotal role of tools like ultrasound, healthcare providers can ensure patient safety and procedural efficiency.